
IMPORTANT: Some 2G users have experienced problems with the latest version of WinPwn. *****FOR THE PARTITION SIZER, SET IT TO 512MB!!! IF YOU DO NOT SET IT TO SOMETHING ABOUT 500MBS, IT WILL NOT WORK*****Or either deselect CydiaEither deselect Cydia or you can still follow these instructions using WinPwn 2.0.0.3 and the 2.0.0 iPhone firmware.
Please keep these notes in mind...
- You MUST do a full uninstall of winpwn before installing the new version
- Make sure you have the latest version of iTunes ( Currently 7.7)
- WinPwn uses 300MB of ram at peak due to the ipsw being extracted in memory
- You must first click browse and load an IPSW to use WinPwn (i thought this was clear)
- For 2.0 only the *5A347_Restore.ipsw files are valid. The 345 image will not work
- If you see Failed to load image catalog/payload catalog, this is fine and won't cause problems
- If you already have service with AT&T do not activate or install Youtube Fix
These are instructions on how to unlock and jailbreak your 2.0.1, 2G iPhone using Windows and WinPwn.
To follow this tutorial you will need to have iTunes 7.7 installed (make sure to reboot). Also, you may need to download and install .Net Framework if you are on Windows XP.
Step One
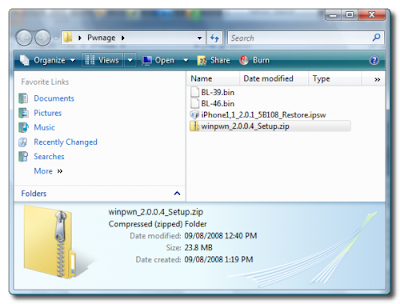
Create a folder on your desktop called Pwnage. In it place the following files: Winpwn 2.0.0.4 or Winpwn 2.0.0.4 , 3.9BL , 4.6BL , and the latest 2.0.1 firmware.
Step Two
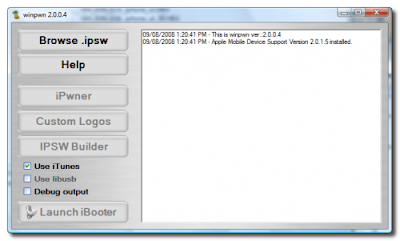
Install WinPwn by extracting the downloaded zip from Step One and running the setup executable. Once WinPwn has been installed it will put a shortcut icon on your desktop. Double click to launch the application.
 Step Three
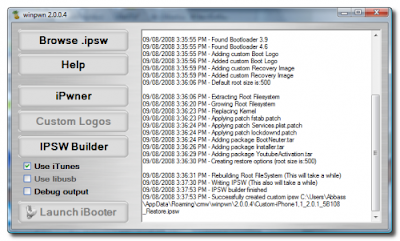
Once WinPwn has opened click the Browse .ipsw button.
Step Four
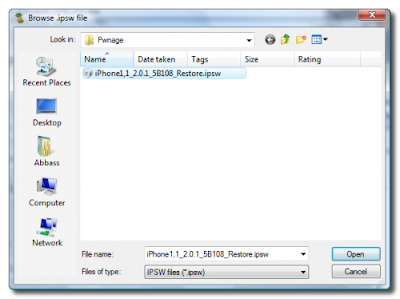
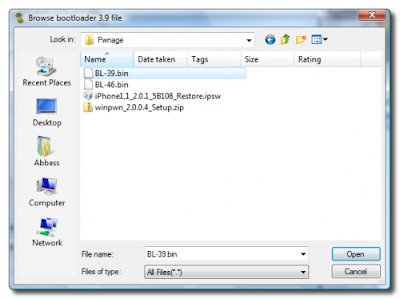
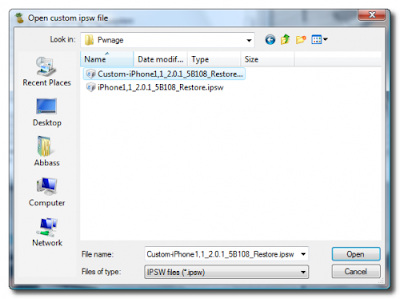
Locate the 2.0 firmware file (iPhone1,1_2.0.1_5B108_Restore.ipsw) from the Pwnage folder on your desktop and click Open.
Step Five
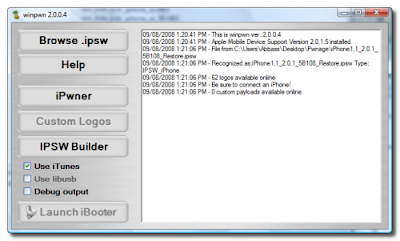
WinPwn will check the firmware to make sure its valid. Now click the IPSW Builder button.
Step Six
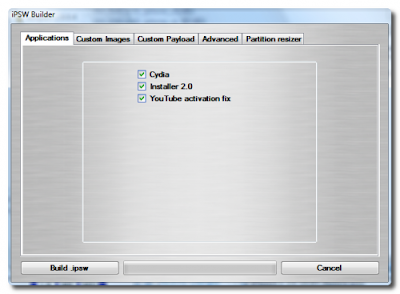
The IPSW Builder window will open to the Applications tab. Check to select Cydia and if you are not on AT&T then check to select YouTube Fix.
Step Seven
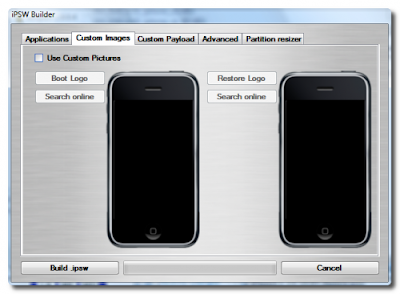
Click to select the Custom Images tab. From here you can can select
your own boot images.
Step Eight
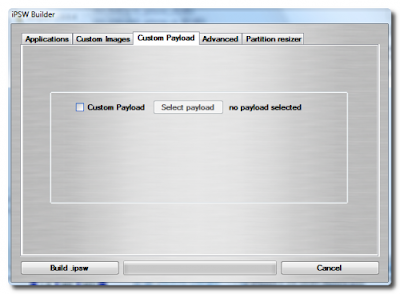
Click to select the Custom Payload tab. From this tab you can select custom payloads you have created to be automatically installed. We will discuss this in a future tutorial.
Step Nine
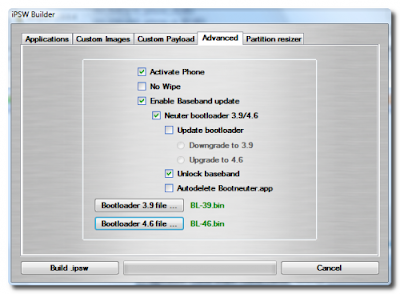
Click to select the Advanced tab. Check to select: Activate Phone, Enable Baseband update, and Unlock baseband.
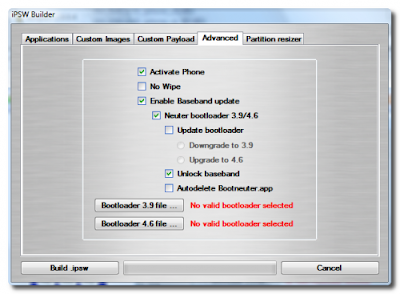
We will also need to load the Bootloader files. Click the Bootloader 3.9 button and then select the BL39.bin file in your Pwnage Folder. Then click the Bootloader 4.6 button and select the BL46.bin file in your Pwnage Folder.
Step Ten
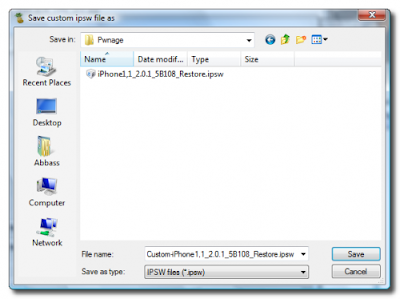
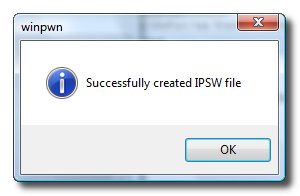
Click the Build .ipsw button at the bottom left to build your custom ipsw firmware file. Navigate to your Pwnage folder and click the Save button.
Step Eleven
Once WinPwn has finished creating your custom firmware then click the iPwner button from the main menu.
Step Twelve
Select the custom firmware file we just built from the Pwnage folder on your desktop and click the Open button.
Step Thirteen
You will then be notified that your iTunes has been Pwned!

Step Fourteen
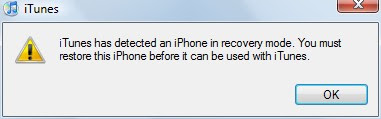
Next we will need to put the iPhone in the DFU mode and restore using iTunes. To put your iPhone into DFU mode please follow these instructions: Press and hold the Home button and the Sleep/Wake button at the same time. After exactly 10 seconds release the Sleep/Wake button. Continue holding the home button until you iTunes pops up a message telling you that it has detected an iPhone in recovery mode. The iPhone screen will remain black. NOTE***: It may take a few attempts to get your iPhone into DFU mode. Generally, I hold down both buttons then release the Home button just before I think the Apple logo would appear. If you are still holding both buttons down and you see the Apple logo you are holding them down for too long!
Step Fifteen
iTunes will prompt you that you are in recovery mode.
Hold down Shift and click the Restore button in iTunes.
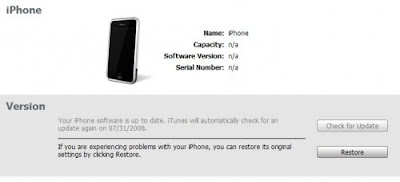
A popup window will appear asking you to select your firmware. Select the Custom firmware file we saved in the Pwnage folder and then click the Open button.
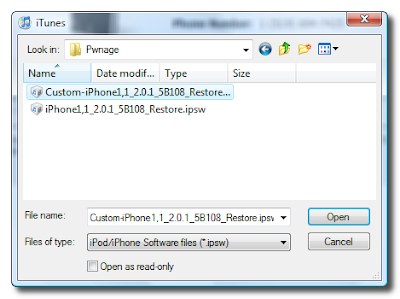
Once the restore is complete you will have your iPhone unlocked and jailbroken!
Next we will need to put the iPhone in the DFU mode and restore using iTunes. To put your iPhone into DFU mode please follow these instructions: Press and hold the Home button and the Sleep/Wake button at the same time. After exactly 10 seconds release the Sleep/Wake button. Continue holding the home button until you iTunes pops up a message telling you that it has detected an iPhone in recovery mode. The iPhone screen will remain black. NOTE***: It may take a few attempts to get your iPhone into DFU mode. Generally, I hold down both buttons then release the Home button just before I think the Apple logo would appear. If you are still holding both buttons down and you see the Apple logo you are holding them down for too long!
Step Fifteen
iTunes will prompt you that you are in recovery mode.
Hold down Shift and click the Restore button in iTunes.
A popup window will appear asking you to select your firmware. Select the Custom firmware file we saved in the Pwnage folder and then click the Open button.
Once the restore is complete you will have your iPhone unlocked and jailbroken!


6 comments:
Worked great. Thanks for this helpful guide.
THANK YOU SO MUCH I NEEDED TO UNLOCK SO BAD!!!!!!!!!!!!!!!!!!!
DA MAN INDIANAPOLIS
hey i have a problem when i restore using my cutom restore they show me error 6 occur how do i do about it ?
when i am in the ispw builder. in the advanced options i cannot click on any of the little accept activate iphone and no wipe. does any one konw why??
Since im a newbie I have few questions please do find time to reply to them
Guys How to find that my iphone is jailbreaked i am sure that it is been unlocked since i can use any sim card...
Right now i just want to install third party Apps in my iphone how to do it ? whether i have to backup my iphone from itunes and proceed doing the procedure as mentioned in the blog?
My phone Version is 1.1.3(4A93)
& Modem Firmware is 4.2.13_G
I have youtube application also installed in it is this mean that can i install any third party apps
how to Install apps through USB connection without Wifi Step by Step with the Screen shots would be more helpful
thanks in advance
do send me any links if possible through mail so that i will browse them and will help my self
Post a Comment