
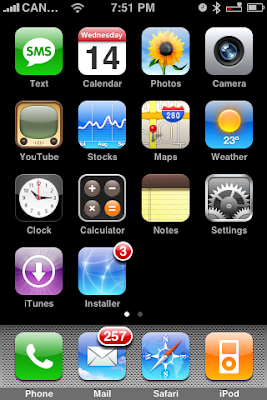
Step One
Press to launch Installer from your SpringBoard.
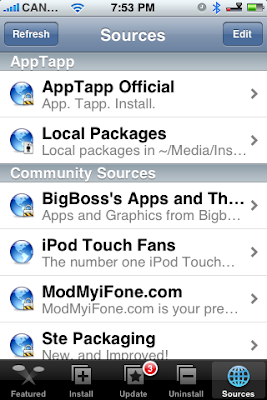
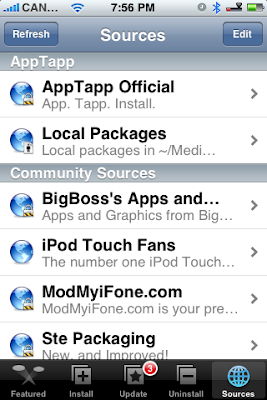
 Step Two
Press to select the Sources tab from the bottom of the screen.
 Step Three
Press the Edit button at the top right of the screen.
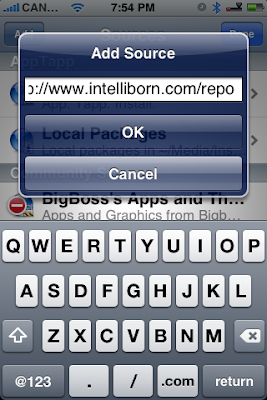
 Step Four
Press the Add button at the top left of the screen.
 Step Five
Enter http://www.intelliborn.com/repo as the source and press the large OK button. If you do not know how to add a source to installer app. follow these instructions.
 Step Six
Press the Done button at the top right of the screen.
 Step Seven
Press to select the Install tab at the bottom of the screen.
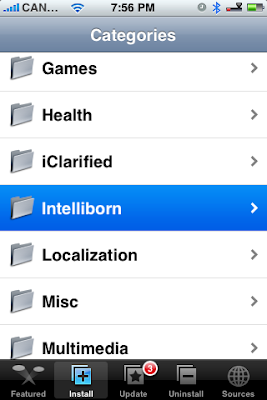
 Step Eight
Press to select Intelliborn from the list of Categories.
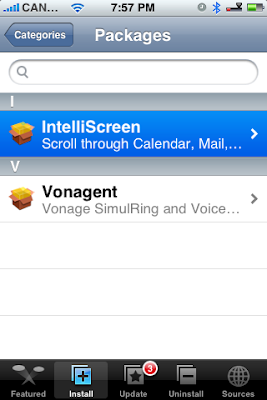
 Step Nine
Press to select IntelliScreen from the list of Packages.
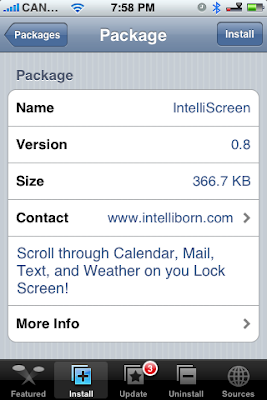
 Step Ten
Press the Install button at the top right of the screen.
Step Eleven
Press the large red Install button that appears.
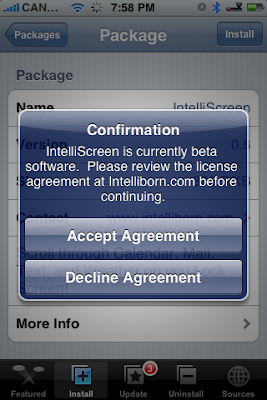
 Step Twelve
Press to select Accept Agreement from the Confirmation Notice that appears.
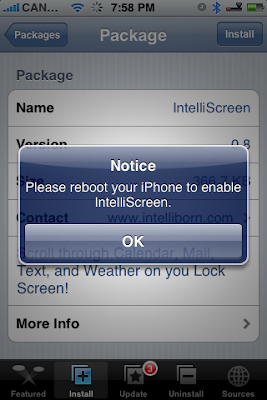
 Step Thirteen
You will then be notified that you must reboot your iPhone to enable IntelliScreen. Click the large OK button.
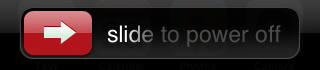
 Step Fourteen
Press the Sleep/Wake button for 3 seconds until the power slider appears. Move the slider to the right to power off the iPhone. Press the Sleep/Wake button again to turn the iPhone back on.
 When the iPhone reboots you may be asked to accept the IntelliScreen Agreement. Click the Accept Agreement button.
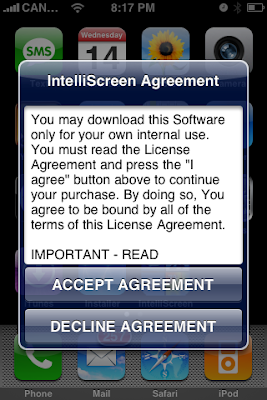
Step Fifteen
Notice that now you will have a new IntelliScreen icon on the SpringBoard. Click it to launch the application.
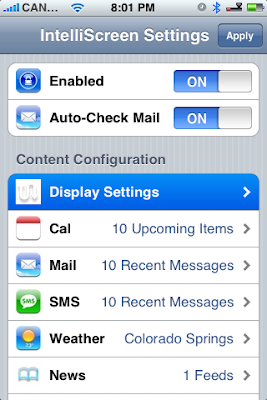
 Step Sixteen
You will now be taken to the IntelliScreen Settings window. From here you can set your preferences for the unlock screen. First, notice the two switches at the top of the menu. Set the Enabled switch to ON to enable IntelliScreen on your unlock screen. Set the Auto-Check Mail switch to ON to allow IntelliScreen to automatically check your email.
 Step Seventeen
From the IntelliScreen Settings Menu press Display Settings.
 From the Display Settings Menu we can select when to display each section.
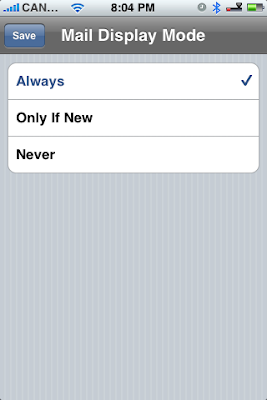
For example, if you press to select the Mail section we can choose to have Mail displayed on our unlock screen: Always, Only If New, or Never. Press the Save button to confirm your selection.
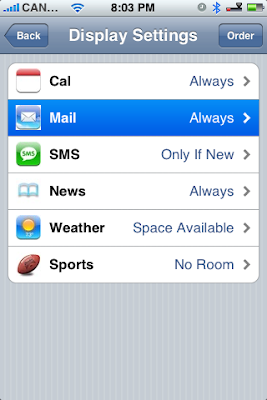
 From the Display Settings Menu we can also press the Order button at the top right of the screen. In the Display Order Menu drag the handle at the right of each section to order the list. Press the Done button when satisfied.
 Step Eighteen
You also set how many iCal, Mail or SMS messages are shown on your unlock screen. To do this, select Cal, Mail or SMS from your IntelliScreen Settings Menu.
 Select how many items you would like to show then press the Back button.
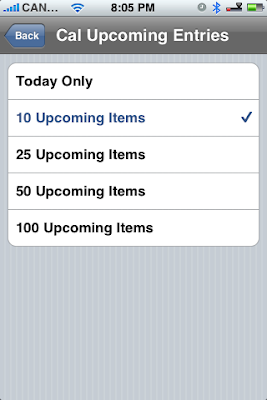 Step Nineteen
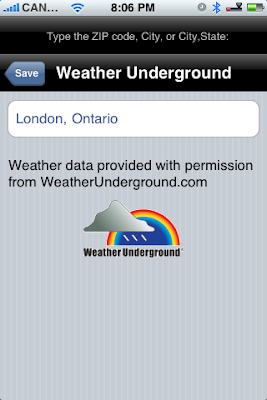
Press to select Weather from the IntelliScreen Settings Menu. Enter your City, State then press the Save button to finalize your setting.

 Step Twenty
You can set News Feeds and Sports Feeds to display on your unlock screen. Press to select the section from the IntelliScreen Settings Menu.
 From the News Feeds Menu you can select a feed to set how many items it shows. To add a feed press the Edit button at the top right. Then press the + button at the top left.
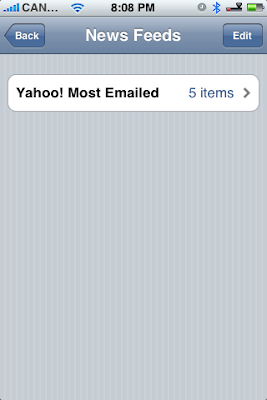
 Press to choose the feeds you would like to display then press the Done button at top right of the screen.
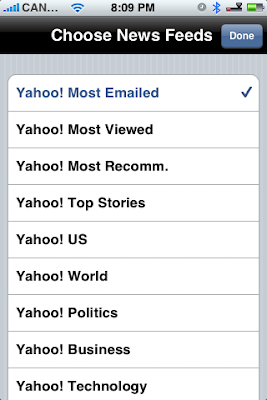 You can follow the same procedure for adding Sports feeds as well.
 Step Twenty One
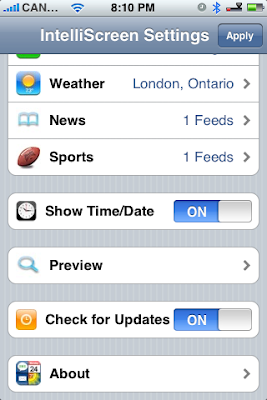
Notice at the bottom of the IntelliScreen Settings Menu there are two more switches. Enable the Show Time/Date switch to show the time and date on the unlock screen. Enable the Check for Updates switch to allow IntelliScreen to check for updates.
 Step Twenty Two
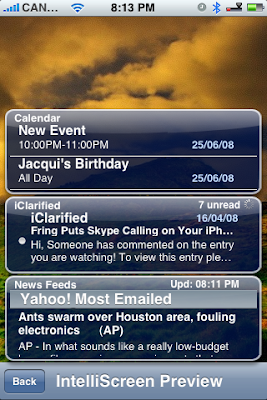
Press the Preview button on the IntelliScreen Settings Menu to preview what your unlock screen will look like. Press the Back button to return to the Settings window.
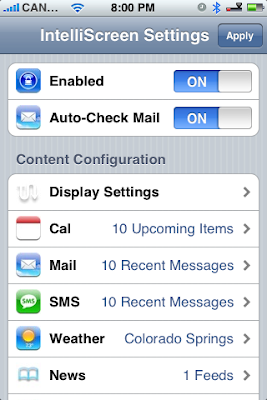
 Step Twenty Three
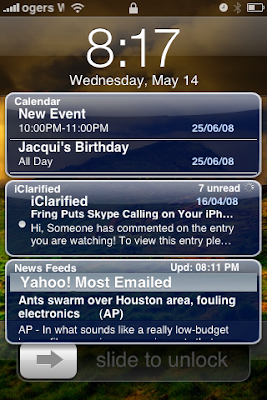
Press the Apply button at the top right of the screen to finalize your settings. Here is what your new unlock screen will look like.


1 comment:
Do you need to buy an Apple iPhone unlocked? Now you can unlock your iPhone by yourself. iPhone Unlock Solution - iPhone Unlock Software. It is very to use and friendly interface.
Post a Comment